Post processing LIDAR data with Cloud Compare
Author: Rohith Maben
Citation:
Maben, R. P. (2024). Post processing LiDAR data with Cloud Compare. Zenodo. doi.org/10.5281/zenodo.11609836
Introduction
In the previous tutorial, we explored the operational and data processing aspects of working with the LIDAR data acquisition from UAS. In this tutorial, we will use a post-processing tool called Cloud Compare. Cloud Compare is an open-source 3D point cloud processing software designed for working with 3D point cloud data, such as those generated by 3D scanners, LiDAR (Light Detection and Ranging) devices, and photogrammetry. It is a versatile tool that is often used in various fields, including geospatial mapping, archaeology, environmental science, engineering, and more. Cloud Compare offers a wide range of features for visualizing, processing, and analyzing 3D point cloud data.
Tutorial
Learning outcomes:
• Navigating the user interface
• Loading and manipulating a LIDAR data file
• Using the manual segmentation tool for manual classification
Installation
The software is free to use and can be installed from CloudCompare - Downloads
Navigating the user interface
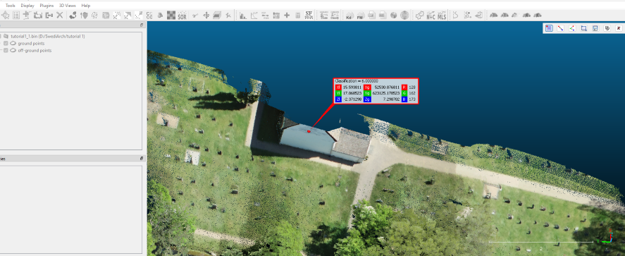
The user interface primarily consists of the 3D view box, Database tree, properties view and a console at the bottom. The left side contains the "view toolbar" for display related tools. The The database tree allows for selection and activation of entities and their features. The "Properties Panel" is a part of the user interface that provides detailed information about selected points or objects within the loaded point cloud data. It allows you to view and edit various attributes and properties associated with the selected elements.
Loading and manipulating a LIDAR data file
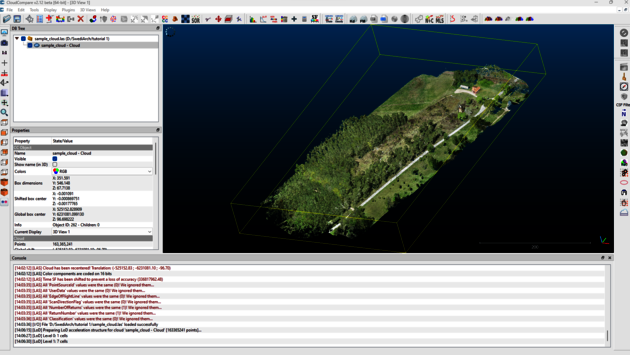
1. Load the Point cloud data (e.g., .laz) into the cloud compare software:
File-> Open -> sample_cloud.laz
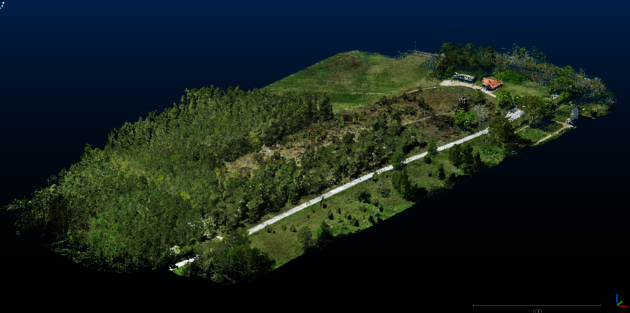
Navigate through the point cloud scene using mouse and keyboard controls to zoom, pan, and rotate the view. Change the viewpoint to view the point cloud data from different angles. To save an image of your data, select the following in the drop-down menus.
Display-> Render to File
By default, Cloud Compare may display the color of the points based on a scalar field, such as "Intensity" or "RGB" if the data contains that information. You can change the scalar field used for coloring by adjusting the visualization settings. To change the scalar field that determines the color of the points, go to the "Edit" menu and select "Change Scalar Field."
Tools-> Projection->Export coordinates to SF.
You can select from various scalar fields associated with the loaded point cloud data. This gives us a good visualization of the elevation data in the point cloud file.
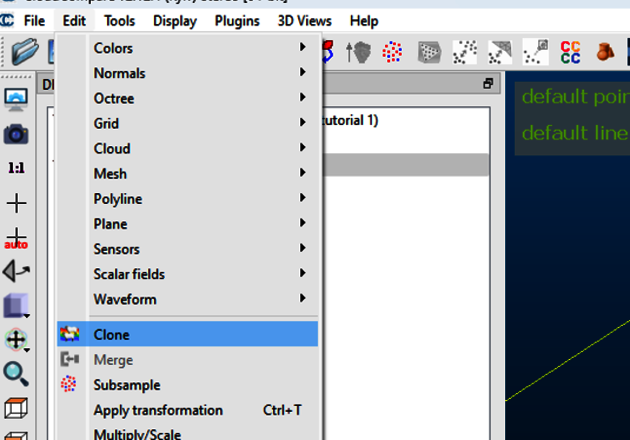
2. Clone the original file for further operations: This option allows for cloning the selected entity(ies) for further operations.
Select the original point cloud, then: Edit-> Clone.
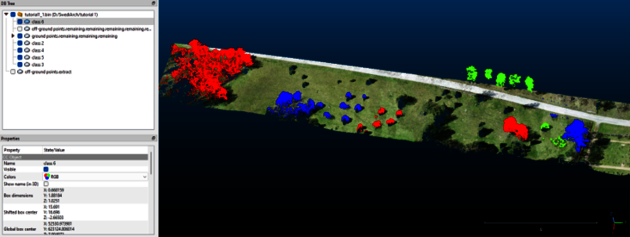
3. Manual polygon segmentation: Manual segmentation of Off-ground points using a classification tool

Manual segmentation in Cloud Compare involves the process of selecting and extracting specific regions or objects of interest from a point cloud data set using manual user input. This is often necessary to separate and isolate features within the point cloud for further analysis or visualization.
Segment (Interactive Segmentation Tool) Menu/icon This tool is accessible via the icon in the central upper toolbar or the 'Edit > Segment' menu.

This tool lets the user interactively segment the selected entities by defining a 2D polygon (or a rectangle) on the screen. This process can be repeated multiple times, changing the entities' orientation each time to segment the entities in 3D properly. The user can decide to keep the points (or triangles) falling inside or outside the polygon border each time. This step requires manually segmenting some groups of points representing each class (with the scissors tool of Cloud Compare). The classification button can be used for each class of interest to assign the specific class number.
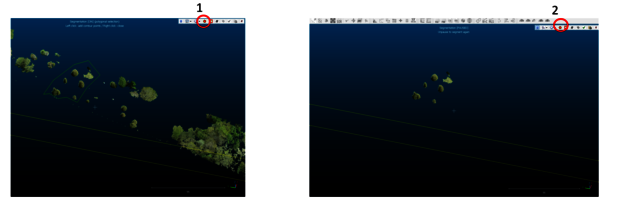
In the Main Tools Menu, click on the scissor icon, then use the polygon shape to select the region of interest and right-click when finished.
With the manual segmentation tool active, start selecting individual points or a group of points that make up the object or region you want to segment. You can typically use a selection box or a lasso tool to specify the area you wish to segment.
Add or Subtract Points: You can often add to or subtract from your selection by holding down specific keys (e.g., Ctrl or Shift) while making selections. This allows you to refine your selection precisely.
Finalize the Selection: Once you've selected all the points that make up the desired region, finalize your selection.
Segment and Isolate: Use the segmentation tool to create a new segment based on your selection. This will separate the selected points from the rest of the point cloud data.

Review and Save: The segmented region will be displayed separately in the 3D view. You can review it to ensure it includes the intended objects. If satisfied, save the segmented region as a separate point cloud file.
Repeat for Additional Segments: If you need to segment multiple regions or objects, repeat the process for each one.

From the Main Tools Menu, select the “Point Picking tool”. This allows for selecting the desired cloud points.
Manual segmentation is followed by merging segments into ground and vegetation class. When the classification is complete, When you have subsamples of the class (e.g., vegetation), recombine the clouds into one using the Merge Tool in the Main Tools Menu. Select all of the clouds that contain the same class and click on the Merge Tool button.