
Correcting terrestrial laser scan registration for use in RealityScan - Blender assisted registration correction
Author: Stefan Lindgren and Carolina Larsson - Last update 2026-08-19
Citation:
Larsson, C., & Lindgren, S. (2026). Open-Source Workflow for Correcting Terrestrial Laser Scan Registration for RealityScan [Computer software]. Zenodo. doi.org/10.5281/zenodo.21989989
Tutorial 4: Blender assisted registration correction
Purpose
Use Blender to manually correct registration errors and create an improved alignment that can be refined later in MeshLab.
Installing Blender
Blender is an open source 3d-modelling software, that can be used to do this rough alignment. Blender can be downloaded from https://www.blender.org/ Select the latest version, download and install it.
Workflow
The following steps require some familiarity with Blender.
To do the rough adjustment download the Blender file “Meshlab_Blender_scripts.blend”. It is an otherwise empty Blender file that contains the scripts used throughout this tutorial. These are python scripts that are run inside Blender.
Importing the registration
Open the Blender file and run the script 1_ImportFromMLP.py by pressing the triangle to the right of the script name.
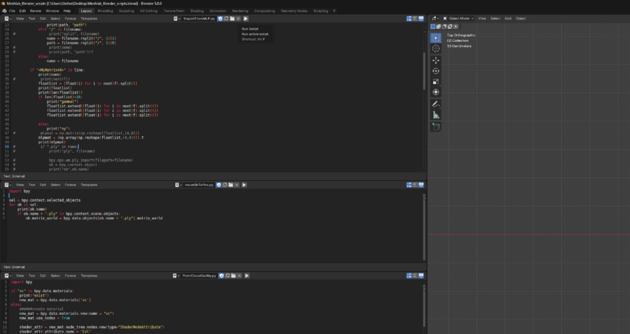
Select the MLP file that contains all the scans. What is imported are just the scanning positions visualized with xyz axis for each of them.
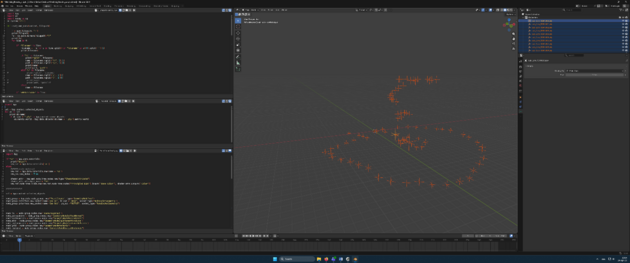
In the Outliner Editor - Right click on Scene Collection and create a new collection and select it by clicking on it. Import the subsampled PLY files (File>Import>ply) browse to the folder with the PLY files. Select all by clicking A on the keyboard. Click import PLY.
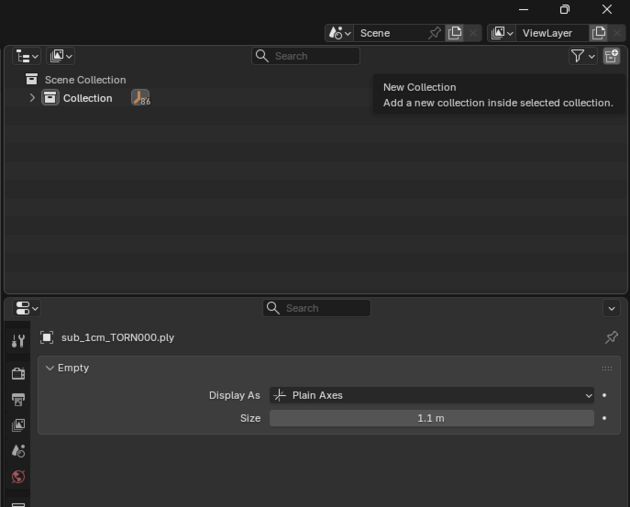
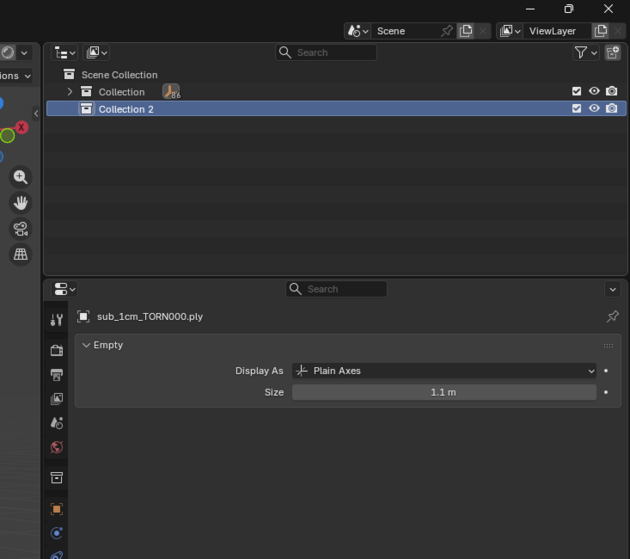

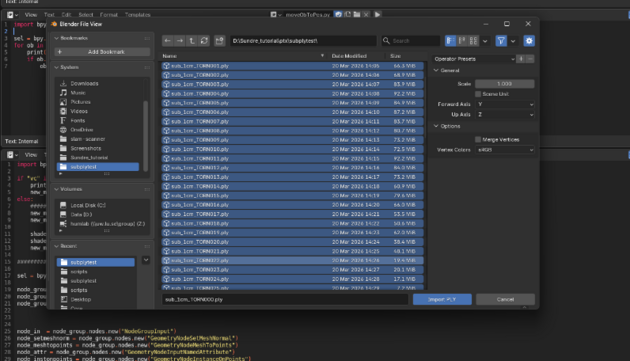
They should now be imported to the new collection created before.
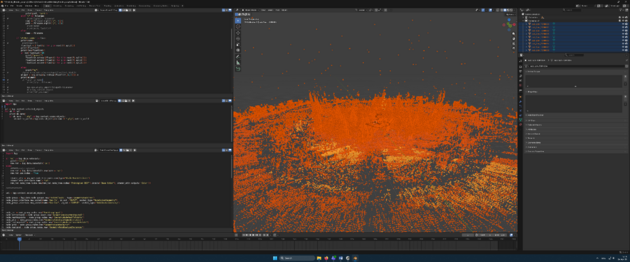
Select the imported scans (right click on the collection and Select Objects) and run the script 2_moveObToPos . It will move the scans in the position of the empties in step one
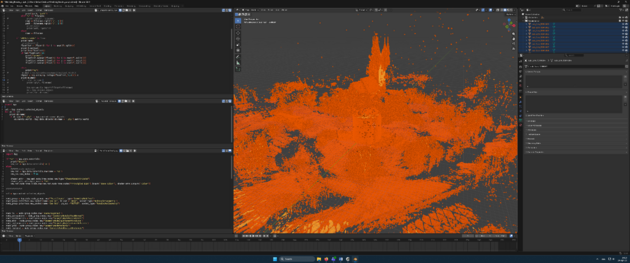
Visualizing the point clouds
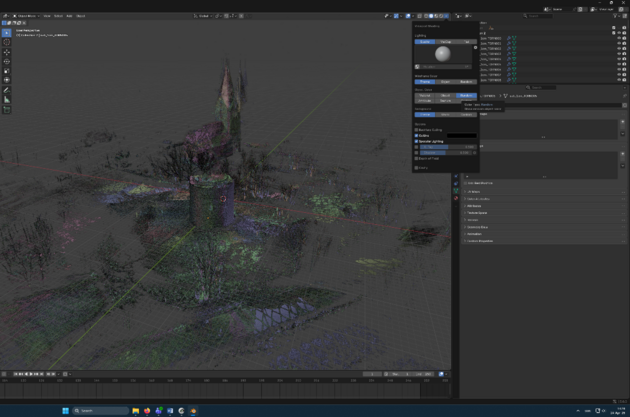
Blender is not good at showing point clouds by default. For a better point cloud shading run 3_PointCloud.py with the scans selected.
To see random colors on the scans, select Random in the shading options (the down arrow after the different Viewport shadings in the header). If you want to see the vertex color, change to Material preview shading instead of Solid shading. Warning! This requires a good graphics card.
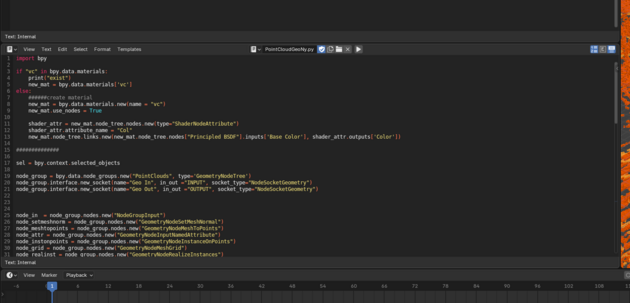
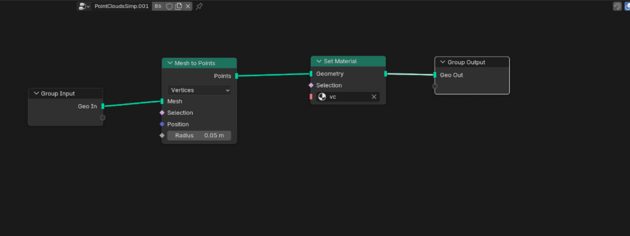
How 3_PointCloud.py script works: A ply file is imported as a mesh with only vertices. The script converts it to a point cloud using Geometry Nodes, which is a system for modifying the geometry of an object with node-based operations.
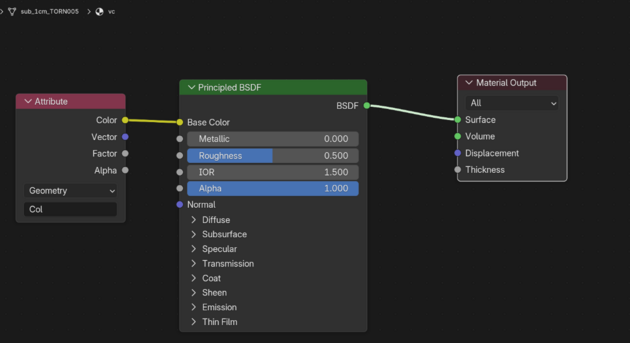
The script creates a material with the Col attribute (the imported vertex color) as the input of the Base Color. It also adds a modifier to each of the selected objects with a node tree that converts the mesh to points and adds the material just created.
Correcting the registration
The goal is not to achieve a perfect registration in Blender. Instead, the scans should be moved and rotated until the registration errors are small enough for MeshLab's alignment tools to refine the result automatically.
Change the transformation pivot to 3d cursor in the header. Place the 3d cursor by shift + right clicking where you want the center of the transformation. Select a scan and transform it (e g R + Z to rotate it around the Z axis or G to move it).
Exporting the updated registration
When you have a better rough alignment, select the scans and run 4_exportMLP.py to write a mlp file with the new transformations. Save it in the same folder as the ply files.
Alignment Refinement in MeshLab
Once a better rough alignment has been created, the registration can be refined using MeshLab. Open the mlp in Meshlab 2020.12 and run the automatic align processing again, as shown earlier in Tutorial 3: Recreating and testing the registration in MeshLab. If that works, then save it as a Meshlab project.
Result
At the end of this tutorial you should have:
• An MLP file containing an improved registration.
• Registration errors reduced sufficiently for MeshLab refinement.
Continue with Tutorial 5: Updating PTX Files and Importing into RealityScan once the registration has been successfully refined in MeshLab.